Design your own blog on WordPress with this easy tutorial for beginners. Get started with everything you need to know to create a successful blog your readers will love.
A fter exorbitant amounts of research, lip biting, and re-organizing my desk, I finally stopped avoiding the important next step in my blogging journey.
I closed my eyes and hit send on the email giving my new host the ok to move my blog to WordPress.
Then, I shut my laptop and started pacing.
Would I be able to figure out how to use this new platform? Would my blog look ‘good enough’ without spending thousands to hire a professional designer?
I’m a mom, a writer even, but a tech-savvy web developer I am not.
Still, I’ve been able to create a successful blog that serves my readers, brings me so much joy, and provides a full-time income so I can afford to stay at home with my kids.
No matter how big your reservations about designing your own blog on WordPress, I’ve lived to tell: it’s much simpler than what you’re probably imagining right now.
You can do it and do it well with a few simple steps and resources!
How to Design Your Own Blog
If you want to start a blog, but you’re not sure where to start, or even what a blog should look like, this post is for you. Maybe you don’t feel like you’re computer savvy enough.
Don’t let that hold you back from starting your blog. This WordPress website design tutorial will take you from a blank screen to writing your first beautiful post to share with the world!
If you haven’t yet signed up for your WordPress blog, go back to the previous post in this series on How to Start a Successful Blog to catch up.
Then come back here, and I’ll show you how to design a blog on WordPress quickly, so you can get started on the fun stuff: writing!
Yes, you do need to have a professional-looking blog design to be successful and earn an income from home.
What you don’t need is to spend thousands on professional design services to get it.
You can design your own blog design easily and affordably. Here’s how.
1. Choose a Theme
Your theme is the basis of design for your blog. If WordPress is the software that runs your blog, then the theme is the template that makes it look pretty and professional.
In fact, once you’ve chosen a theme, your design, including most of the layout, is about 90% done.
How do you know which to choose out of the millions of free and paid WordPress themes out there?
It may be tempting to pick one based on the lowest cost or the prettiest layout.
There’s nothing wrong with those criteria, but there are a couple things that are even more important if you want to build a successful blog.
What to Look for in a Blog Theme:
- Speed
- Security
- Support
The best way to get all of these is to purchase your theme from a reputable company.
I use the Divi Theme from Elegant Themes because it meets all of these important criteria.
They have great support, so I can quickly get the answer to any of my questions.
Their themes are regularly updated to the latest technology and security changes to keep your blog running smoothly.
ET has dozens of well-designed themes, and you get access to all of them for one price. (That way if you end up changing your mind, it’s no big deal to switch. They have a money back guarantee too.)

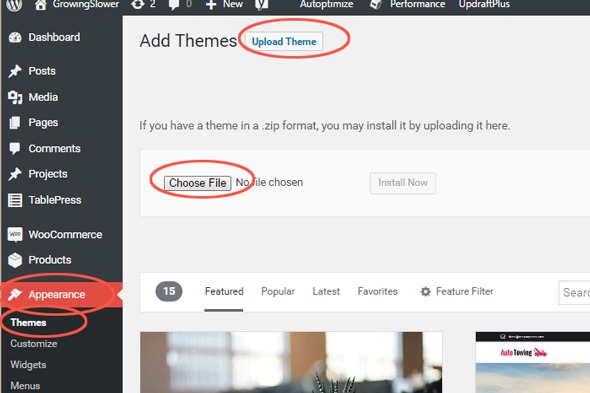
How to Install Your Blog Theme:
After you’ve chosen and downloaded a theme, you can now upload it to your blog.
- Find the Appearance tab in your WordPress dashboard
- Choose Themes
- Click the Add New button at the top
- Then, Upload Theme
- Select Choose File and locate your Theme .zip file on your computer
- Once you’ve uploaded the theme, hover over its image and click the Activate button.
- If you purchased a theme, you may be prompted to enter your username and API key at this point to activate it.
Next, we’ll customize the building blocks of your theme to make it a reflection of you and your blog.
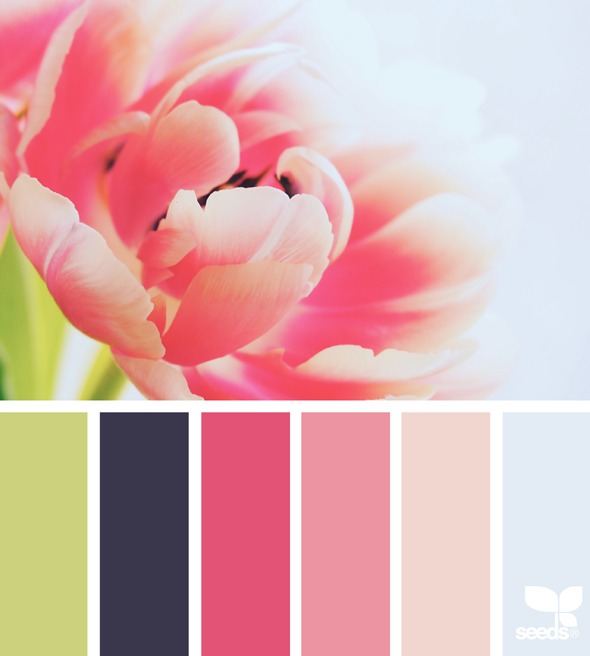
2. Select Your Blog Colors
Now onto the fun stuff! We’ll select the colors you’ll use in your blog design, logo, and any graphics you might create in the future.
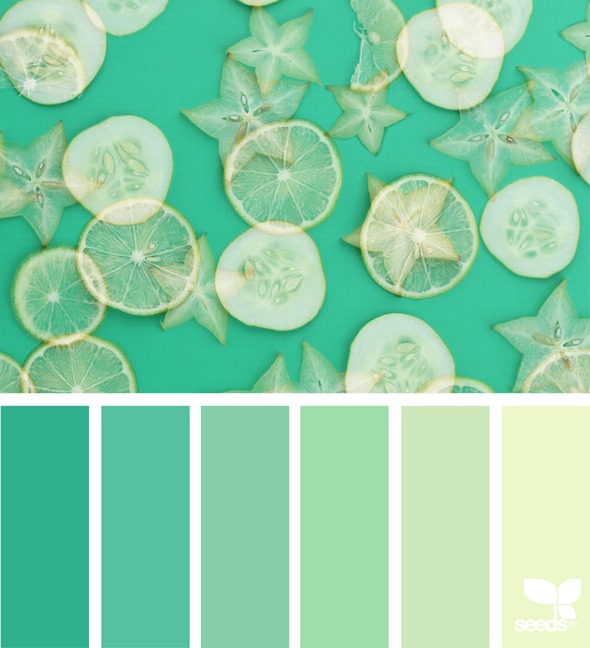
My favorite place to start thinking about color schemes is Design Seeds.
Start with browsing their “By Collection” categories, if you’re unsure if what colors you want to use.
Once you have an idea of a color or two you’d like to use, search by color for color schemes that include one of your top picks.
Consider Color Meanings for Your Blog Design
Still feeling overwhelmed with all the options? Think through color meanings and how they relate to your amazing blog topic.
Is the audience you’re writing for feminine or masculine? What mood or energy do you want to convey?
Here are a few examples of how color meanings might inspire your blog design.
- Red: Energy, Passion
- Pink: Femininity, Gratitude
- Orange: Playfulness
- Yellow: Attention-Getting, Happiness
- Green: Health and Healing, Nature, Money
- Blue: Success, Security
- Purple: Spirituality, Sophistication
- Grey: Authority, Stability
Choose One Color for Each of These Categories
When it comes down to choosing the final colors for your blog, I recommend using shades and tints of the following:
- One Main Color
- One Accent Color (used sparingly)
- One Darker Neutral (to be used for text)
- One Lighter Neutral (for the background)
Save the “hex color code” (the six digit number that looks something like this: #DEF0D0) in a safe place.
DIY Blog Design Inspiration #1
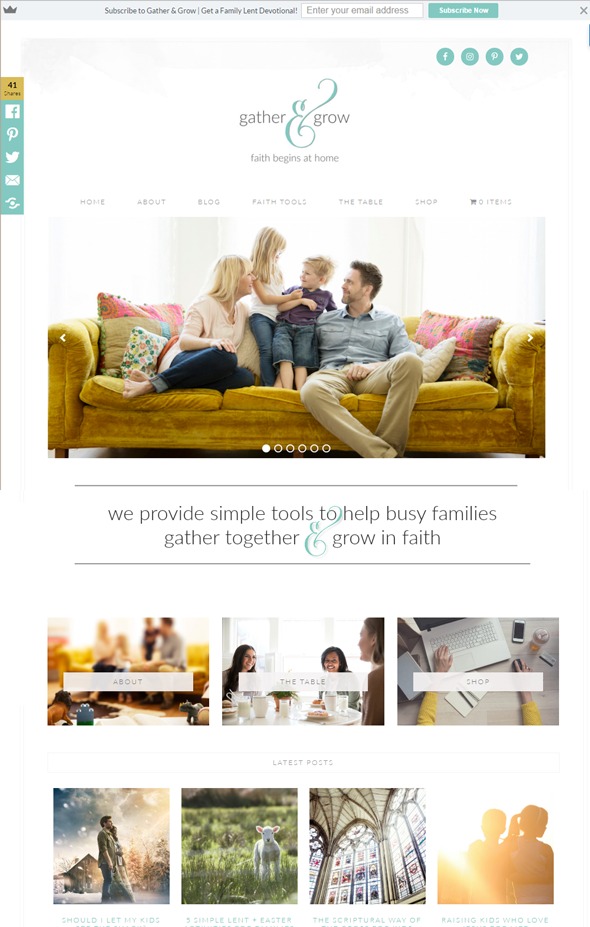
Jessica from Gather & Grow did a phenomenal job designing her own blog!
I especially love the way she made her blog stand out using a simple color scheme consistently throughout her design.
As I broke it down above, she has the four key colors:
- One Main Color: Aqua
- One Accent Color: Gold
- One Darker Neutral: Dark Gray for text
- One Lighter Neutral: White for the Background
Do you love how she even picked up the gold color in the photos?
3. Select Your Blog Fonts
Now it’s time to choose the fonts for your blog. For the most part, you’ll use these in your logo, social media graphics, and possibly the bold headings within your blog posts and titles.
Here again, it’s best to keep it simple. Above all, you need to find something that is easy for your audience to read.
Of course, you want it to look good, too, and convey the spirit of your blog.
The 3 Fonts Your Blog Needs
I recommend limiting your font choices to the following.
- An easy-to-read bold font
- A “fancy” accent font
- A light (thinner) font, also plain/easy-to-read
When searching for fonts, choose one that is available for commercial use, so you don’t violate copyright.
The following occasionally offer free fonts and have low-cost fonts available for purchase.
Where to Find Great Fonts for Your Blog:
DIY Blog Design Inspiration #2
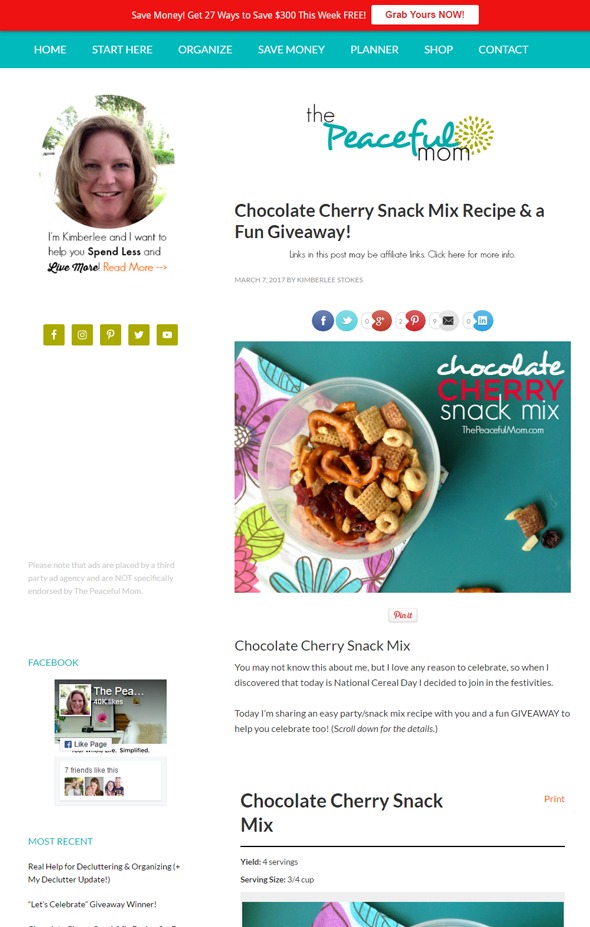
Kimberlee of The Peaceful Mom has the 3 font types we talked about above.
She used two fonts for her blog logo, combining a bold handwriting font with a light sans serif.
Then she pulled in an additional bold sans serif font in all caps to use for her shareable blog graphics below. Love it!
4. Create Your Blog Logo
You’re probably sensing a theme by now. When it comes to creating your blog design, keep it simple. This especially applies when designing your logo.
Now that you’ve chosen your colors and fonts, all you need to do is combine them to a simple, easy-to-read logo.
If you’re not sure what I mean, think about some of the most iconic brand logos. The ones you can envision without even trying: Coca-Cola, Target, Lego, Google.
What do they have in common? In most cases, they have these three things in common.
Simple 3-Part Formula for Creating Your Blog Logo:
- One simple, easy-to-read font
- Use one brand color and possibly an accent or a neutral
- An uncomplicated symbol (optional)
For your blog logo, I recommend you follow this formula, too.
Create Your Logo in Canva
My pick for the fastest and easiest way to create your logo is Canva. They have some fantastic logo templates that will have you set to go in minutes.
When you’re creating your logo, modify the templates to use the custom colors and fonts you chose earlier to strengthen your individual brand recognition.
Canva is affordable at $12.95 for a month and useful for creating other important graphics for your blog like your Facebook page cover, images for Pinterest, and more.
If you opted to use the Divi theme, the default logo size is 100 pixels wide by 47 pixels high. Otherwise, check with your theme provider for the dimensions for your particular theme.
Save your logo files in PNG file format to keep the edges of the letters nice and crisp.
DIY Blog Design Inspiration #3
I have one last DIY blog design example to share to help you catch the vision.
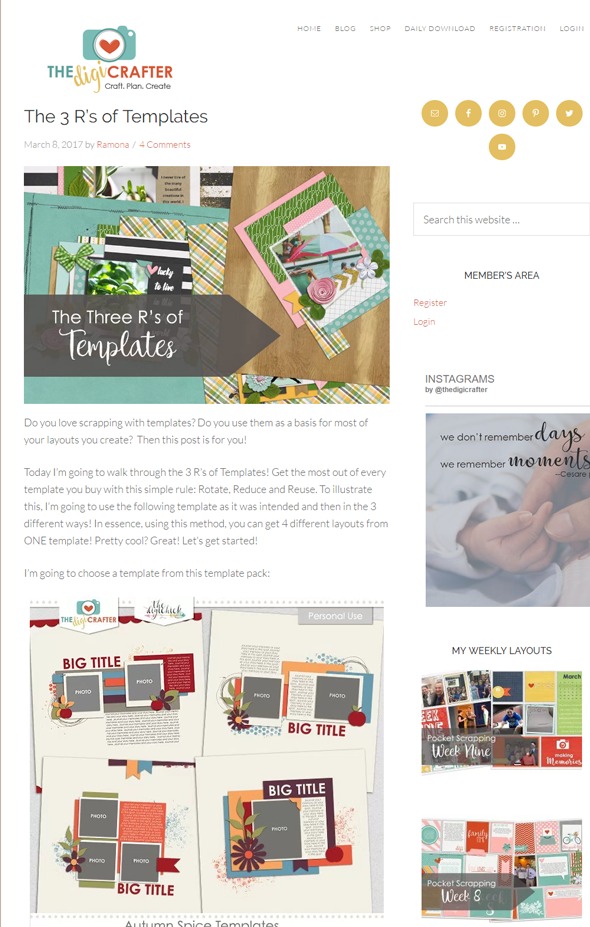
Ramona of the DigiCrafter used a playful multi-colored palette throughout her design to reflect the creative nature of her digital scrapbooking blog.
I love how she used her three fonts (a bold, a ‘fancy’, and a light font) in both her logo and in her other blog graphics.
5. Create Your Blog Favicon
Your “favicon” is the tiny square that shows up in your browser tab next to the name of the page. Keyword: tiny.

Again, use the same fonts and colors you used in creating your logo for your favicon. This time, however, remember this needs to be readable at a minute size on your screen.
You won’t be able to fit your entire blog title. Instead, use just the initials or a symbol if you have one.
If you’re using Divi, create a square icon for your blog. You’ll want to have one version that is 512 pixels by 512 pixels to use as your Site Icon.
Save another one at 16 pixels by 16 pixels to use as your Favicon. (I’ll show you what to do with these in the next step below.)
Save these as PNG files.
6. Customize Your Theme
Now we’ll put that beautiful new color palette and logo into your actual blog design. Hurray!
I’m going to go over a few most important options you can customize in your theme.
First, find the location in your theme where you can modify colors. (In Divi that’s the Theme Customizer.)
Here’s here you enter your hex color code for your blog colors. You can modify the background; title, text, and link colors; accent colors, and much more.
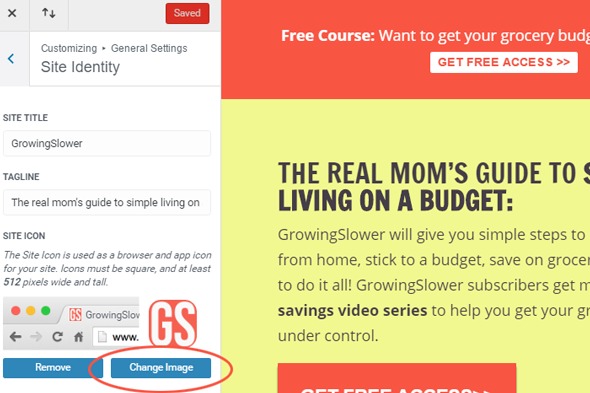
Next, upload the logo and small favicon you created.
Now upload your larger Site Icon.
That’s it! You did it!
See How Easily You Can Design Your Own Blog?
Even though the thought of designing my own blog in WordPress was intimidating at first, I soon learned it was much easier than I imagined.
I have every confidence that you can do it too, especially if you use the simple guidelines and resources included in this post.
Don’t wait until your blog design is “perfect” to start sharing your story with the world.
Give yourself a couple of hours to work through choosing your colors, fonts, and creating your logo. Then start writing!
After all, that’s what blogging is really about.
If you do want to add even more custom design elements to your blog over time, I love the book Blog Beautiful. It walks you through 50 simple steps to make your blog shine.
I can’t wait to see your beautiful designs!
Share your progress and your questions in the comments.