
How to make your own Christmas cards free online with just basic computer skills, a couple of free programs, and no scrapbooking required! Easy tutorial.
There are some amazingly adorable, and shockingly expensive, photo Christmas card options out there! The companies that sell them make the cards extremely easy to create and print, so mostly, it’s the convenience that drives the price. When your Christmas budget is really tight, having printed cards sometimes just isn’t an option. That doesn’t mean you can’t send out holiday greetings to your loved ones, though!
When your Christmas budget is really tight, having printed cards sometimes just isn’t an option. That doesn’t mean you can’t send out holiday greetings to your loved ones, though! Today I’m going to show you how to quickly make your own Christmas photo cards free online.

Christmas photo cards cost how much?!
First, let’s take a closer look at the price of having it done for you on a site like Shutterfly or Tinyprints. At first glance, the prices don’t look so bad. The lowest prices I found at this writing had Christmas photo cards available “from” 55 cents a card. That didn’t seem so bad until I realized you have to order more than 225 of them to get that price! The true cost is much higher.
Let’s say that you want to send cards to 50 of your loved ones. You’ll pay $44.50 for the cards plus $6.99 for shipping, and that’s just for the very basic photo card design available. Don’t forget to include the price of stamps at another 49 cents. That’s $1.52 per card, for a total of $76! I don’t know about you, but that represents a significant chunk of my Christmas gift-giving budget.
Instead, I want to show you how you can make your own Christmas photo cards free online this year, using just basic computer skills, a couple of free tools, and most importantly, no scrapbooking! Then, you can email your photo card along with your family Christmas letter completely free! (We live in the digital age, it’s ok to do this!) Of course, you can choose to print a few copies of the Christmas card for those who are just dying to have it up on their refrigerator.

How to Make Your Own Christmas Cards Free Online – Video Tutorial
(A photo version of the tutorial follows if you’d rather read than watch video.)
How to Make Your Own Christmas Photo Cards Free Online – Photo Tutorial
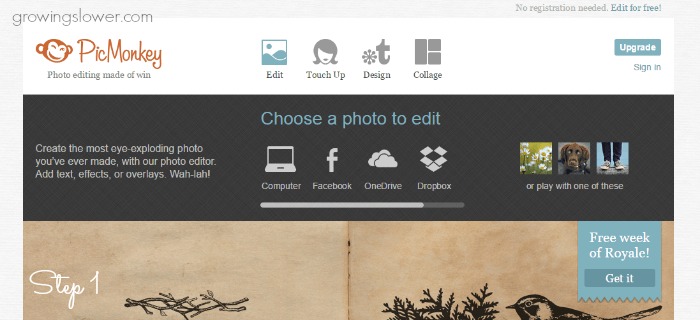
1. Go to PicMonkey.com.
PicMonkey is a free tool for editing photos with tons of options for making your own Christmas photo cards. (that’s my affiliate link, but the tool is free to use)
Find the family Christmas picture you want to use. Check out my DIY Christmas Photo Cards board on Pinterest for ideas and inspiration. This goes really fast if you have an idea of what you want your photo cards to look like before you get started.
If you plan to print your cards, make sure to select a high-resolution image.
Click “edit”, and navigate to the photo you’d like to use for your card. Select the photo, and then click “open”.
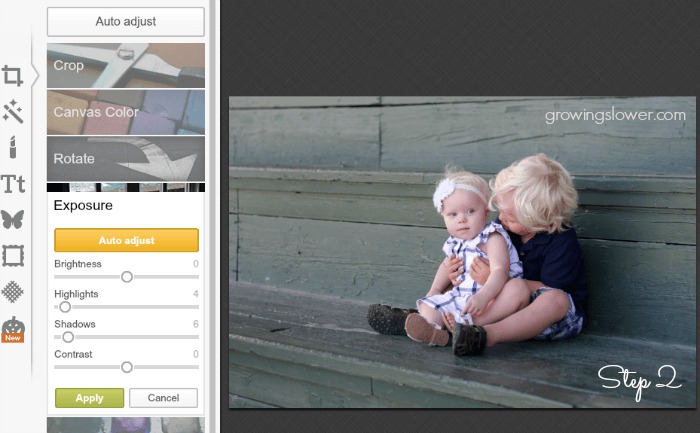
2. If you need to do any basic editing, first adjust the exposure.
Go to “exposure” and click “auto adjust” or adjust it manually. When you’re happy with how it looks, click “apply”.
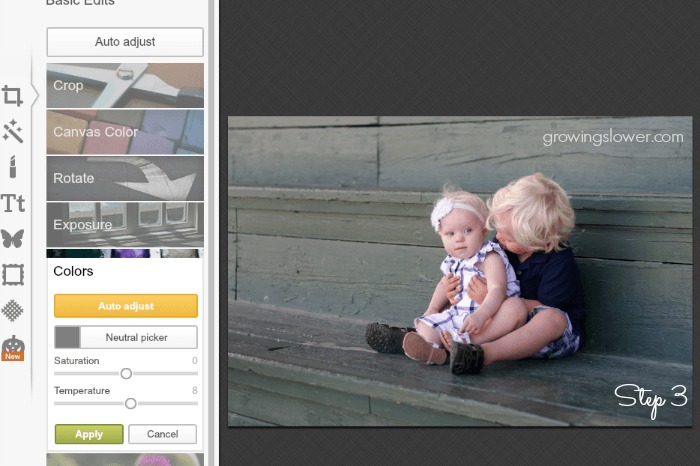
3. Next, you can adjust the color balance.
Click “Colors” and again use “Auto Adjust” or use the controls to adjust it manually. Once it’s looking good, click “Apply.”
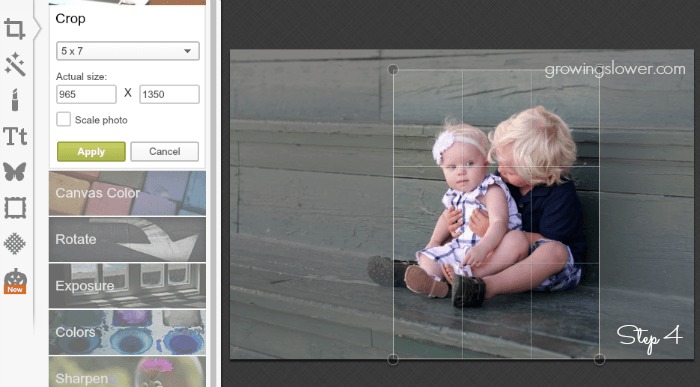
4. Crop your photo.
Now we’re ready to design the card! Click “Crop” and select your desired proportions. I selected “5×7” for this example. If possible, try to line up a main line or focal point of your photo on one of the 1/3 lines shown in the crop box.
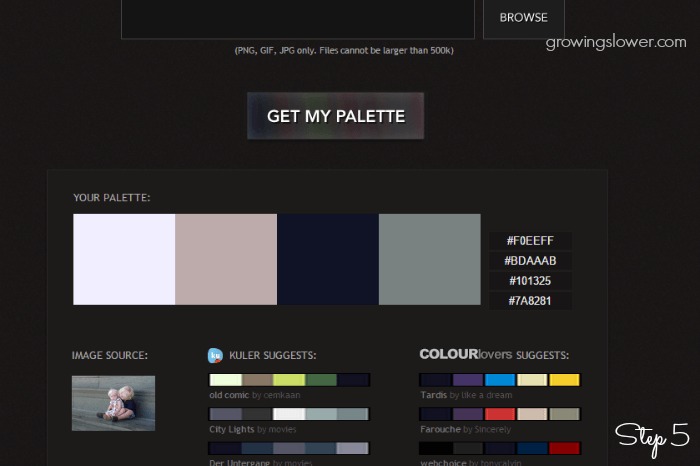
5. Pick a color scheme.
If you’re not sure what colors to use, upload your photo to Pictaculous.com (another free tool), and it will give you several color combinations that will work well for your photo.
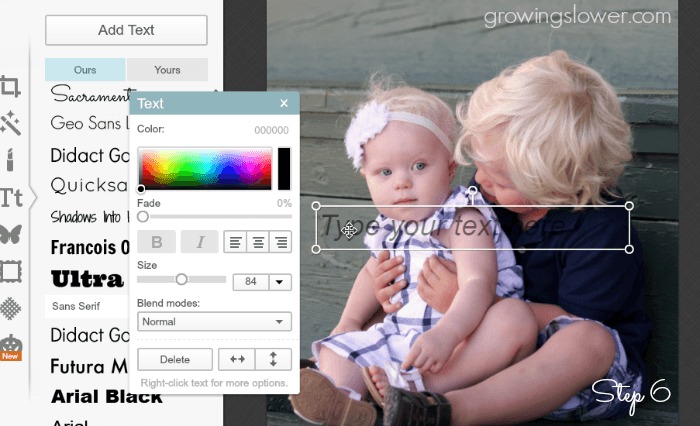
6. Next, let’s add some text!
To add text, first, click the “Tt” icon. Then click the “Add Text” button. A box will pop up over your photo that says “Type your text here”. Click in the box and type your first line of text.
Once you’ve typed your text, you can change the color, size, fade (transparency), alignment, or blend using the text edit box. You can also change the font by clicking on your text and then selecting any of the fonts on the list at the left. (Note that the fonts with the orange crown next to them are not free.)
I’ll be using my favorite fonts: Veranda, Geo Sans Light, and Sacramento. Each of the words is in a separate text box.
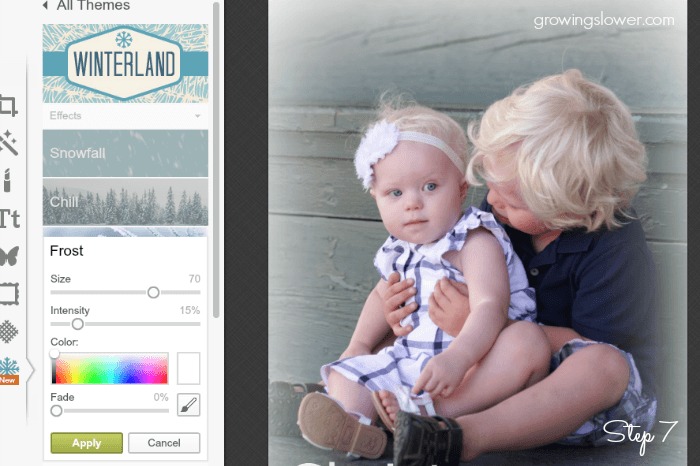
7. Now let’s add some Christmas cheer!
Click the snowflake icon on the far left at the very bottom. Then select “Winterland” or “Santaland” for Christmas-themed effects and art to add to your Christmas photo card.
I used “Winterland” and then clicked on “Frost”. A frost effect will be automatically added to the picture. I adjusted the size to 70 and the Intensity to 15%. Then, click “Apply”.
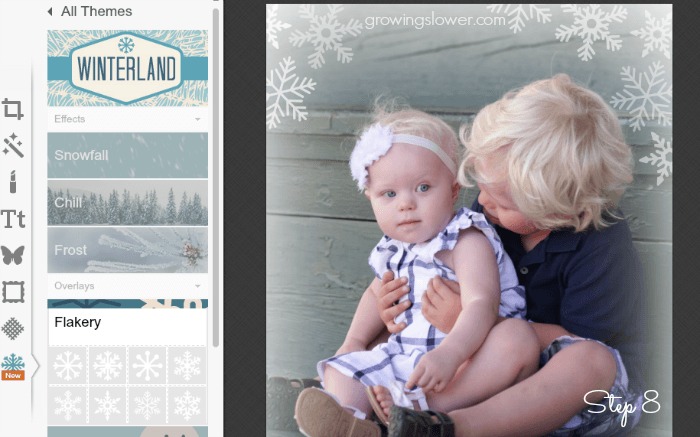
8. Don’t forget the snowflakes!
Next, I clicked “Flakery”. To add snowflakes, simply click on the shape you like. It was automatically pop up on your photo. Click on the snowflake to move it. Click and drag the open circles at the corners to make it bigger or smaller. Click and drag the open circle with a line to rotate it. You can also adjust the color, fade, and blend. If you decide you don’t like one that you’ve created, click “delete”.
All of my snowflakes are set to 40% or 60% blend. I think it works best if you try to keep a similar size and rotation, and only use 2-3 different shapes of snowflakes.
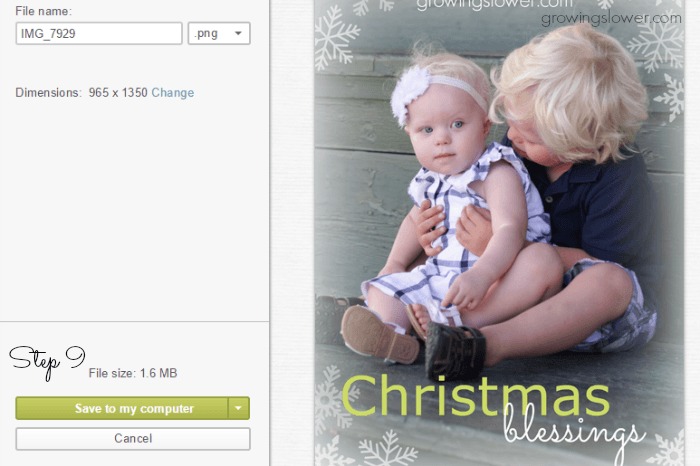
9. Don’t forget to save!
Click “Save” at the top. Then click the down arrow next to .jpg, and select .png. This file type works best if you have lettering on your photo card. Then click “Save to my computer”.
That’s it! You’ve made your own Christmas photo card, and now you’re all set to email it to as many friends and family as your heart desires completely free! Not only that, but you’ve saved almost 100 bucks and many hours of addressing, stamping, and sealing envelopes!
How many Christmas cards do you usually send? What’s the best Christmas card idea you’ve seen?
(I do wish you a blessed Christmas season! Thank you so much for reading!)